Sunday, March 29, 2015

Copper Embossed/Engraved Mirror

Silent Auction Mirror
7th & 8th Grade Copper Embossed/Engraved Mirror


This project sold last night at our annual Silent Auction for $350.00.  I was thrilled, it took me 3 class periods with my students, a few hours on my own and about $20.00.

Materials:
sketch paper
pencils, dull and sharp
drawings of wildflowers
tape
padded paper napkins or towels
stomps
5"x5" sheets of coppertone metal sheets, enough for the class plus 8 extra to cover the sides.  I bought mine through Dick Blick: http://www.dickblick.com/products/art-metal-foil-sheets/
India Ink
20"x20" of wood - I used birch plywood from Home Depot which they will usually cut to size for me.
Liquid Nails
hanging hardware
10"x10" mirror

Day 1:
The students each were given a paper with 2- 5"squares traced on the paper.  I explained the project & instructed them to look through the many pages of wildflower drawings that I had & start sketching.  I explained that I wanted them to either fill up the page, create a border around the edges or have a design going into each of the four corners.  
Day 2:
I did a quick demonstration of the following process so that they would have an idea how this all works.  Cut out their favorite sketch & tape it to top of the copper plate.  Place the copper plate & sketch on a padded surface like quilted paper towels folded up.  Go over the sketch in pencil so that it makes an indent in the copper plate.  Remove the paper.  Now take a dull pencil and retrace any areas that they would like to engrave.  Flip the copper plate over and use either the dull pencil or a stomp to emboss areas that they would like to pop out.  Some students chose to add their initials to their copper square
Day 3:
Paint the entire copper plate with India Ink & let it dry some.  Wipe the excess off until you are happy with the antique look.  This took a few tries sometimes. 
On my own:  Put the hanging hardware on the back of the wood.I centered the mirror on the wood board and secured it with Liquid Nails.  I then took the 8 extra copper sheets and cut them in 1/2 with regular scissors.  I molded them around the sides of the board & secured them with Liquid Nails.  This gave the mirror a finished look so, when it is hanging on the wall, you won't see any wood.  Then, I arranged the sheets around the mirror and secured them once again with Liquid Nails caulking.  It took only a few hours to dry.  I had all of the kids sign their names to the back of the mirror & it was off to the auction.  Lots of oohs and aahs and "how did they do that" comments :)
My inspiration was this piece that I found on a web search, it is spectacular:
https://www.flickr.com/photos/anne_page/2330604385/

Sunday, March 17, 2013

Safari Chess Set for Silent Auction

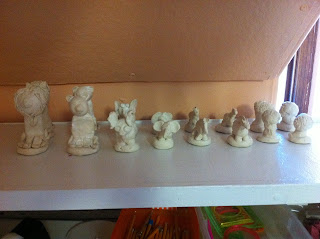
Safari Chess Set


GRADES 5-7

The original idea for this great project was from the blog:


A HUGE thank you to Julie Voigt at art for small hands for being so generous in posting this and many other amazing projects in such great detail.  I am constantly amazed and extremely grateful for this blogging community!

This sold last night at our silent auction for $375.00, I was thrilled, it was the second highest selling item at the auction. (First was a kindergarten painting/collage that I will post next).

DAY 1:
We spent the entire class coming up with an idea. 
I explained all of the pieces in a chess set and how many of each we would need. I took all of the ideas and wrote them on a paper & we voted - Safari was the winner.  We then came up with ideas for the king, queen, bishops, knights, rooks & pawns.

before day 2, I wrote down all of the pieces that we would need, what sizes they needed to be and assigned a student to each piece, they needed to work in groups to assure that they pieces matched each other in shape and size:
2 Kings - Lions - 4" each 
2 Queens - Lioness' - 3 1/2" each
4 Bishops - Elephants - 3" each
4 Knights - Zebras - 2 1/2" each
4 Rooks - Safari Trees - 2" each
16 Pawns - Snakes - 1 to 1 1/2" each

all pieces were to be able to fit in a 2" square, I gave them 2" squares of paper for reference

I made printouts of each animal so that the students would have a visual reference.  I placed these in plastic sleeves.

DAY 2:
We discussed how to use the clay.  Slip, Scoring etc.
We used Crayola Air Dry Clay because our school does not have a kiln.
I assigned groups and we began sculpting.  The two students making kings sat together, the two students making lionesses sat together etc. - they had their animal printout in front of them.
I also had 2 students in each class working on just making bases for the animals to sit on.  I gave those students bottle caps to ensure that all of the bases were a similar size.  They rolled the clay into 1/2" slabs and cut the bases out with clay tools.


At the end of day 2, I covered all of the pieces with lots of damp paper towels and a sheet of thick plastic.  I arranged to have my students come in for an extra art class the following day.  They finished sculpting and we attached all of the animals/trees to the bases by scoring and slipping.  We took floral wire and put a few pieces into each animal/ tree.  The lions had two pieces of wire going from their heads to their bases.  The elephants had the same and pieces in their trunks and ears.  After the students left, I continued to add more wire and make sure that the pieces were all solid.  

Note: the air dry clay shrinks a bit so keep this in mind when adding the wire, some of our wires ended up showing through the top and bottoms, we painted them and it was not a big issue.  We ended up putting felt on all the bottoms so that the clay and wire would not scratch the board.

DAY 3: Finish sculpting.  At the end of this day, I covered all of the pieces with damp paper towels and plastic again.  I slowly, over the next two weeks, began to loosen the plastic & remove paper towels.  After 2 weeks they were just about dry.  The slower the pieces dry, the stronger they will be and they won't crack.  I am happy to say that I had not one crack.  Some of the pieces did separate slightly from the bases, but were secure because of the wire.  In these spaces I stuck some slip in and let them dry over night.  This along with some extra acrylic paint acted as glue.


I went to Home Depot & picked out a piece of pine shelving.  They cut it to size for me 19 x 19".  Once the pieces were dry, I measured them and realized that they would need a 2 1/4" square instead of a 2" square.  I knew that this may happen so, I waited until all of the pieces were dry to decide on what size chess board I would get.  19x19" allowed for the 2 1/4" squares and a 1" border around the entire playing area.  I primed the board:


Before day 4, I worked out a color scheme for each side.  They needed to be different enough so that you could easily know which pieces were yours while playing.

DAY 4: Paint.  Again, the students sat together to make sure that their pieces were either painted exactly the same or different, depending on which side of the board they were going to be on.  One side had bases painted a light brown, the other side green.  We used acrylic paint.  I instructed the students to paint a the largest areas first and not to add any detail.
Two students painted the entire board green.


The board got a second coat of green paint later that day.

 DAY 5: I had a student who is particularly good at measuring draw out the squares on the board.  The tan squares were painted on the board and details were added.  The tan squares received a second coat later in the day.  Once dry, I sprayed all of the pieces and the board with an acrylic sealer.


DAY 6: Students signed the back of the board in Sharpie, we snapped a few photos and it was off to the auction!


Tuesday, January 10, 2012

Silent Auction Kandinsky


     I was asked at the last minute to come up with a work of art for our annual Silent Auction.  With literally one 40 minute class to complete a project in, I was in serious need of an easy plan.  Luckily, I came up with one.  I decided to have the students make a work inspired by Kandinsky's Squares with Concentric Circles.  Luckily, we had studied Kandinsky earlier in the school year so, the art history portion of my lesson consisted of "you remember.....right?".
     Next I handed out a rectangle of sturdy watercolor paper.  I had each student use oil pastels to draw a small circle in the middle of their paper and continue to draw concentric circles around it.  I let them know that about 4 or 5 circles would be about right.  Some students took liberties in adding other lines or made their circles look like flowers, I think that this adds to the charm of the overall piece.
     Then, I had them choose one  color to paint over their circles (watercolor paint).  Viola....done.
When I got home that night I arranged them and rearranged them until I thought they looked beautiful.  Then I flipped them over and taped them together, trying not to leave any gaps showing.  I attached it to a black matte board,  plopped it in the frame and we were in business.  I really had no idea if this would be appealing to the parents who were attending the auction.  As it turns out, it was one of the most bid on items.... a huge success, and the kids had a great time doing it!  In the picture below hopefully you can see that I took a photo of the artwork, printed off a copy on my computer and had the students sign the rectangle that they had completed.  I also had a printout of the Kandinsky original inspiration and a brief explanation of what we did.
     Just to backtrack a bit, I first started with a frame that I liked then bought one piece of large watercolor paper and cut it to fit the frame.  Then, I cut that into equal rectangles.
This project was done by my kindergarteners and 1st graders (I have very small classes).


Tuesday, December 27, 2011

positive negative bugs

I found this lesson on princetonol.com and my students ran with it.  It is a project submitted by Amy Shapley.  I leave my lessons open ended and this allows for more creativity than I could ever dream up.  I have done this project twice with middle school students.  They need to work in a quiet room because this project can easily go wrong.  I love the results, my students never cease to amaze and inspire me.  They asked me if they could add color, I was hesitant but I am so happy that I agreed to let them add the color.  The results make my heart sing.  

Grade 6 sharpie and marker
6th grader
Grade 8
Grade 8 sharpie and colored pencil